Found on this page are two important types of Products you can make – live-ready products in the Production category or test products within the Sandbox category.
The following options and their usage is the same between Production and Sandbox.
Create a Product #
Let’s walk through the steps to create a sandbox Product with three tiers – Bronze, Silver and Gold, grouped into Monthly and Yearly payment schedules.
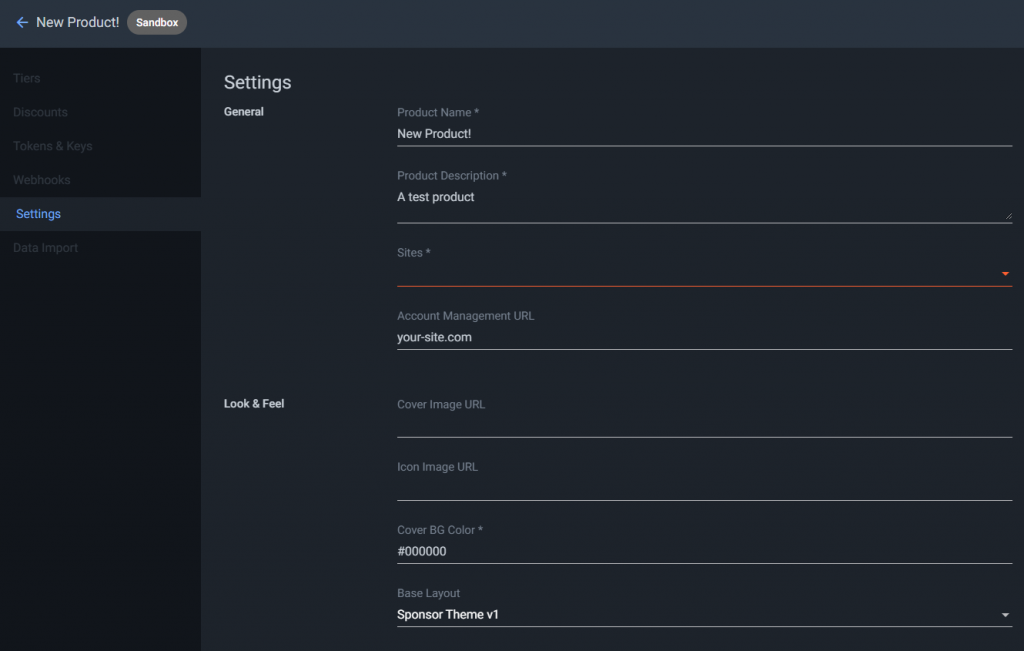
Upon clicking “New Product” on the product page you’ll be brought to the general settings screen shown below.

Name this whatever you’d like, with whatever relevant descriptors you have. Under the Sites drop down, select the appropriate sites you’d like to launch Sponsor onto. The Account Management URL should be whatever your specific user settings page is.
The Look & Feel section controls the cover image, icon image, color and layout of the sponsor portal. You can use any direct link to a hosted image – so long as they pass our guidelines for use. Please contact your support representative if you’re unsure. The layout and images can be viewed once you’re done within the Preview section.
Tiers and Tier Groups #
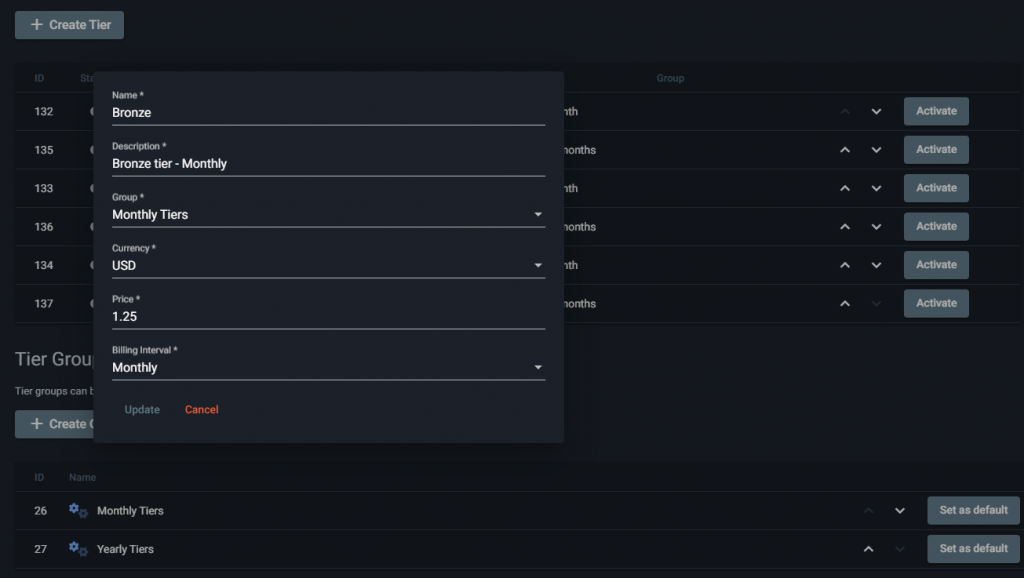
Now let’s create those tiers we mentioned earlier – Bronze, Silver and Gold. We’ll also be making two groups for these tiers – one for Monthly payments and one for Yearly. To do so, navigate to the Tiers section at the top of the menu on the left side. Click Create Tier and you will be greeted by the modal shown below.

Fill this out with your required specs. If you’re unsure about any of these, please contact your support representative. Leave Group as “ungrouped” for now. Repeat this process for as many tiers as you’d like to support, one for Monthly payments and one for Yearly. Keep in mind – you can select other cadences for the billing interval.
Once you’re done you should have something like the image below. Make sure to order them using the arrows shown, into the proper grouping.

To create groups – simple click Create Group underneath the Tiers readout. Give it whatever name you’d like, and then go into the settings for each tier and assign it to the corresponding group as shown below.

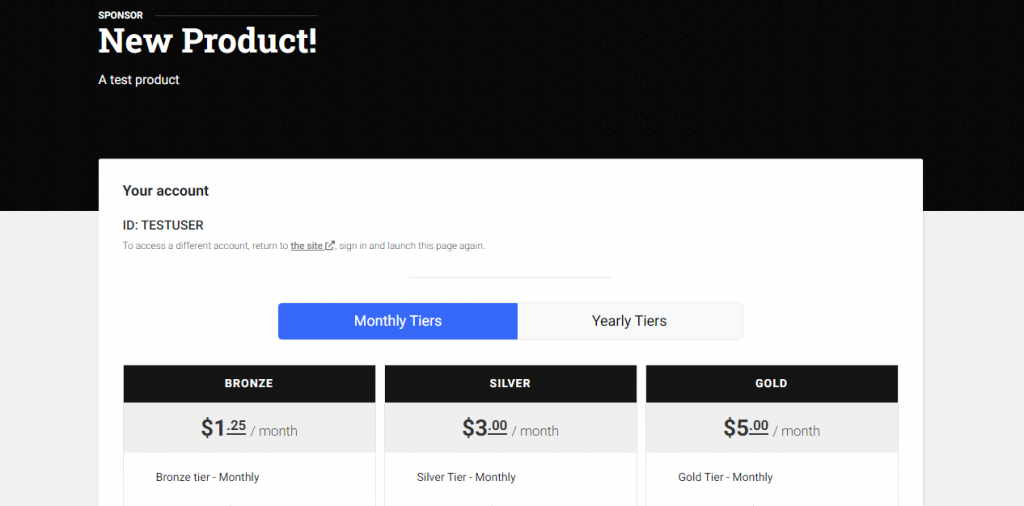
When you’re done, these groups will allow you to partition out the front end presentation of the Sponsor UI between the groups you select – as shown below. You can find this on the Preview tab.

Discounts #
A discount can be created via the Discounts tab. These are used to apply to specific subscriptions in order to gift users subscription time, or to pro-rate for a period defined in the discount.
Tokens and Keys #
This is where you find the private key used for the product. This is used to sign your user data – do not give this key out.
The token generator allows you to simulate the flow by giving any user ID, generating a token and getting a link to a Sponsor portal using your current settings. Upon generating the token click “Open Sponsor Portal” to preview.
Webhooks #
Here you can create and set webhooks to loop into. The events currently offered are subscription cancellation, expiration, creation and when a subscription is changed. These can be used to do a myriad of things – such as assigning a discord role, kicking off a modal on-page or anything else that can be event driven.
Data Import #
This is where you can import discount and subscription data via CSV.


